Monday, September 30, 2013

Huntington projects

Here are a couple of projects made with our Huntington paper pack. 


the first is the layout we are going to make during a gathering this week. Using Huntington paper pack, cuts from the Artbooking Cricut Cartridge and some of our glitter paper.  Would you like to make a similar layout at your own gathering? Contact me for details!


deb and linda with watermark

The next project is our October club project.  Using the same supplies as above (which are listed below as well)

oct club layout with watermark


Supplies used:

X7174B: Huntington Paper pack

Z1906: Artbooking Cartridge

Z1881: Huntington Assortment
Z1847: Green glitter paper
Z1830: Brown Glitter paper
Z1484: Red Glitz Glitter Gel
Z1769: Almond Glitz Glitter Gel
Z1771: Green Glitz Glitter Gel

Saturday, September 21, 2013

My Creation Star Workshop-Thanksgiving

Come join me for a My Creations Star workshop! 
You will decorate one of our my Creation Star bases. 
All paper will be cut for you. 
Coat for workshop $20 includes all supplies minus adhesive. Please bring your own. 
Workshop will be Monday Nov 4 at 7 PM. 
RSVP and prepay by Oct 16. I will get a paypal option up this week 
If you would like to buy the kit and make the star on your own,  you may do that. Cost will be $25 to cover costs of shipping. 
Workshop open to 8 guests so sign up early!


Saturday, September 7, 2013

September club layouts

Club members, here are your choices for club this month. You can make 2 of these out of your paper packs-to do all 3 you may need to buy a few pieces of card stock from me. 
I know Halloween prob is weird for this kit, but my little boy is probably going to be Woody and I thought the colors would be ok for it. Baby cakes kit. Ctmh


Wednesday, September 4, 2013

Halloween layout workshop

Halloween layout workshop will be Thursday oct 10 7-9 pm. All pieces will be cut for you- just come and put it together!
Cost $15
RSVP and prepay by Tuesday sept 24. I will try and get a Paypal set up on here in the next day or so. Please register early. This class is only open to 8 customers!

Here is the layout. Hope you can make it!


back to school and best friends layouts workshop!

Tues Sept 24 7-9pm

Choose one or both layouts! All pieces will be cut for you. Bring your adhesive and put them together! Prepayment and RSVP by Monday sept 9. 

Best friends 2 page layout $15


Back to school layout. 2 options: just the layout $10 or the layout on our fit folio for $15. Our fit folios are folders that go into our page protectors and you can add certificates and art work through the year. 

Here is the front 

Here is the back


 Here is the folio open, not in a protector


 Hope you can join us. You can email me to RSVP and I will also try to get a Paypal option up here for this and the Halloween workshop in the next couple of days. Nikkidscraftyemail@gmail.com


Monday, September 2, 2013

Halloween Workshop

More information to come on this layout and workshop. Save the date! 10/10/13. Cuts made from Artbooking!


Tuesday, August 27, 2013

making a fabric flower

Have you seen our new Base and Bling Jewelry line? There are lots of ways to make the fabric flowers (with fabric that matches our paper lines!) but below I have done a tutorial on making a fabric flower out of 4 circles. 

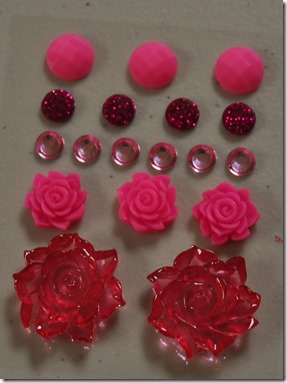
I started with the following items: The clip base, our Chantilly textiles, Base and Bling adhesive dots and strips, Base and Bling pink jewels.

For this project, I started with 3 sizes of circles: 3 inch (pink), 2 inch (yellow) and one inch (green). 4 circles of each.  I have tried multiple different ways to cut the circles.  Some suggested Wonder Under from the fabric store and then cut with the cricut.  That did not work for me.  I ended up having to cut a square a little larger than the size circle I wanted and then hand cut the circle. 

DSC_0761

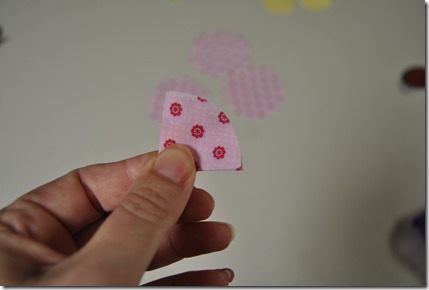
Starting with the pink circles, I took one, folded in half and used the double sided adhesive strips. 

DSC_0762 DSC_0763

Then, another piece of adhesive strip and fold in half again

DSC_0765 DSC_0766

I repeated these steps with the remaining three circles. I ended up with 4 “petals" which when placed together makes a circle.
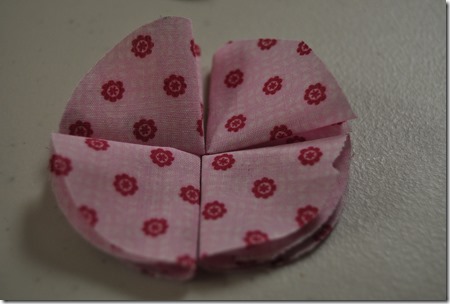
DSC_0770

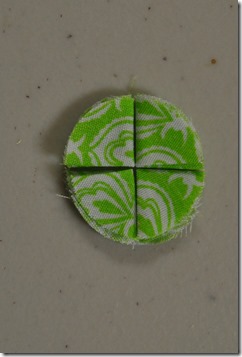
I repeated this process with the yellow and green circles.

DSC_0773

DSC_0777

I then ended up with my base, and the 3 flowers.  I placed an adhesive dot on the clip base (the part that is pink, in this picture I have not taken off the covering over the adhesive)
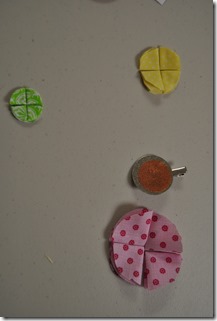
DSC_0779


I then placed the pieces of the pink flower on the base.  I lined up the 4 corners so they would meet in the middle.

DSC_0780

DSC_0781


Here is the back.   I then trimmed the petals so no petals were longer than the rest.

DSC_0782


I repeated the process with the yellow and green petals onto an adhesive dot.  I was then able to trim those as well before layering on the clip on top of the pink flower

DSC_0786


After putting the green flower on, I used some Base and Bling to add to it. 
DSC_0787


Here is the finished clip

DSC_0788

Over the weekend I will do a video tutorial for a different type of fabric flower and making a headband. Come back this weekend!  If you try this out, please post a comment and let me know how it went!

Pin This Page!

Follow me on Pintrest!

Contact Form

Name

Email *

Message *

Join my facebook page!

10 Years!

Shop with Me!